 In part one and two of this tutorial series, we focused on adding the new Facebook pixel to your website and creating custom conversions. In this tutorial, I’ll show you step by step how to add Standard Events on those special pages of your website that you want to track and optimize for your Facebook ad campaigns.
Standard events are optional events you add to your Facebook pixel base code that allow you to better understand the audiences visiting your website and reach specific sets of your users who have visited your website as well as track and optimize for conversions.
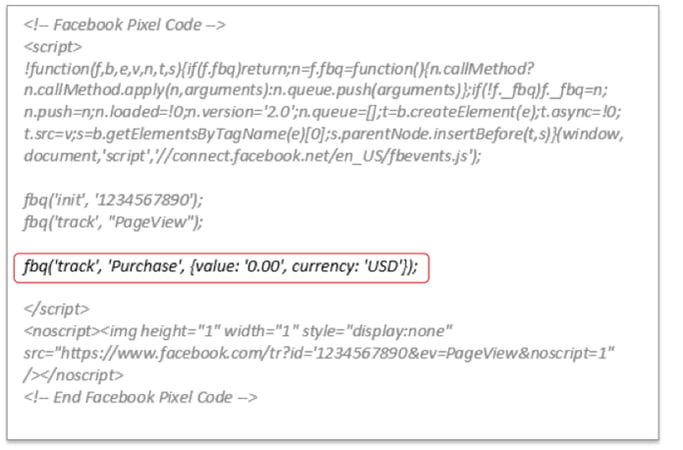
While you should place the default code across all pages of your website, standard events should only be implemented on specific pages of your website. For example, Purchase should be placed only on pages on which a purchase has been made, like the confirmation page in your ecommerce shopping cart.
Another example is if you have an offer or lead magnet on your website, you would place a standard event code on the thank you page. You’ll then be able to track those conversions in Facebook, segment that audience and re-target future ads to anyone who visits this thank you page.
View the Standard Events tutorial:
Step 1:
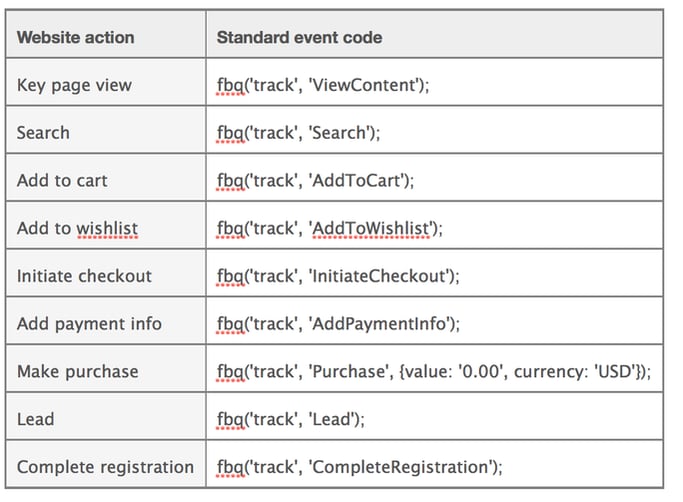
A great place to get started is by using the “Lead” standard event for tracking thank you page sign-ups. Here is the page on Facebook that shows you all of the standard event codes. You have a lot of choices, especially for e-commerce or digital product web sites. One option is even adding different parameters for each standard event code, such as value and currency. Here’s the exact code you need for adding the “Lead” standard event.
Step 2:
Now that you have our lead standard event copied, you’ll want to go to your thank you page that should already have your Facebook base code from part 1 of this video series:
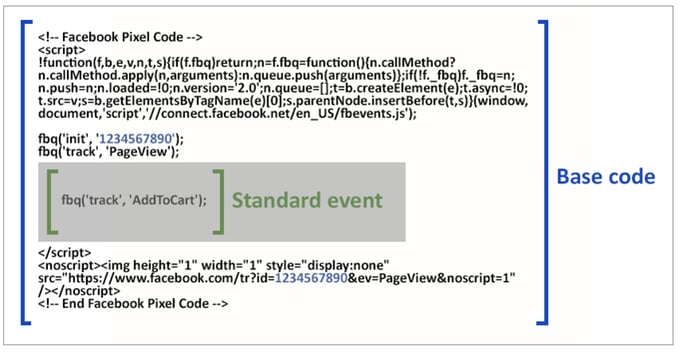
You want to place the standard event before the closing </script> tag within the base code. This will make sure that the pixel will track the correct behavior or actions you decided on.
You also want to place the code only on pages that correspond to the event you’re tracking. For example, if you’re tracking lead conversions, add the code to only the thank you pages and not the actual landing page.
Step 3:
Use the Facebook Pixel Helper I mentioned in part 1 of this video series. This will show whether or not your pixel is verified and firing, and that you've used the right standard event as you check your website.
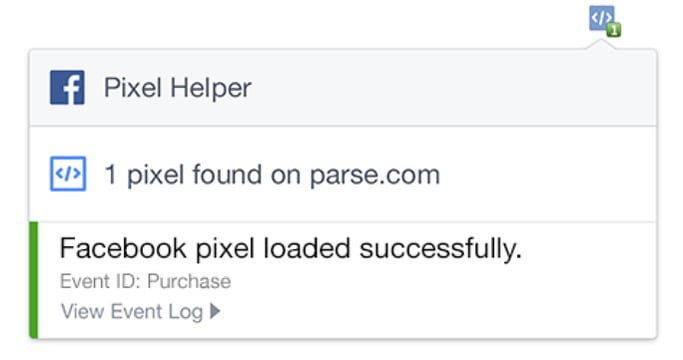
Another way to test your standard event is if you're tracking leads from your website, download an offer and then look for the record of that lead conversion in Ads Manager. This should appear under Events in the Pixel tab.
Congratulations, at this point you’ve completed my three-part series and should have your Facebook Pixel installed, and ready to start tracking conversions and audiences for your next ad campaign.
In my next series, I’ll be focusing on how to use Facebook audience insights with another step-by-step video tutorial.