 Facebook is notorious for making frequent policy and security changes, particularly for business pages. Over the past year, our agency has made a considerable effort to educate ourselves on the policies that directly effect our clients as well as ensure that they are setup correctly with a Facebook Business Manager account. As we ramp up and make more recommendations that include Facebook advertising, it was essential that we took the necessary steps that included following Facebook best practices.
Why use Facebook Business Manager?
Facebook Business Manager is a secure tool that assists with managing access to business pages and ad accounts (mainly geared towards companies who give different permissions to various internal or external personnel). The tool allows you to access pages and ad accounts, as well as clearly see who has access to your pages and quickly remove or change permissions. Additionally, it helps keep personal and work accounts separate by providing access without having to be friends with coworkers on Facebook.
Walk through setting up Facebook Business Manager, step-by-step.
I’ve created a quick and easy video tutorial that walks through the steps you need to take to setup your business’ Facebook Business Manager. I’ve also outlined the steps below the video if you want to quickly skim through each step.
Consider these reasons for setting up your business’ Facebook Business Manager account:
- You need more than one ad account (an example would be a company with multiple business pages and different advertising budgets or agency partners who do advertising for clients.)
- You need or want to request access to Pages or ad accounts.
- You need to assign page permissions to people who work with you.
- You work with a client partner or an agency.
Before jumping in, first decide if you're the best person in your company to set up your business manger account. You should be the primary admin on your company’s current Pages or ad accounts. Once you create your Facebook Business Manager account, you will be able to send email invitations to other people on your team, and give them permission to manage Pages, ad accounts, or apps.
Here’s what you'll need before you start:
- A personal Facebook account to confirm your identity.
- An ad account you want to move to Facebook Business Manager.
- (Optional) A Business Page you want to move to Facebook Business Manager. If you don't have one, you'll be able to create a Page during setup.
- (Optional) The names and work email addresses of the people you'd like to add to your business.
To Get Started with Business Manager first visit this page.
Step 1:
- Click the blue “Create Account” button on this page.
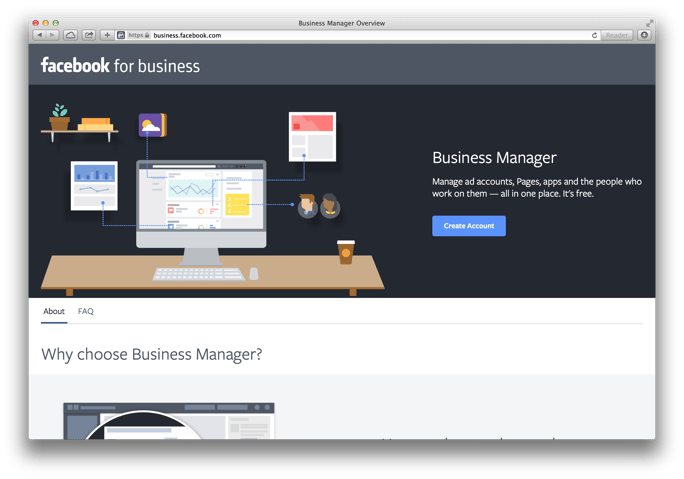
Step 2:
- In the pop-up box, enter your business name. Click the blue button “Continue.”
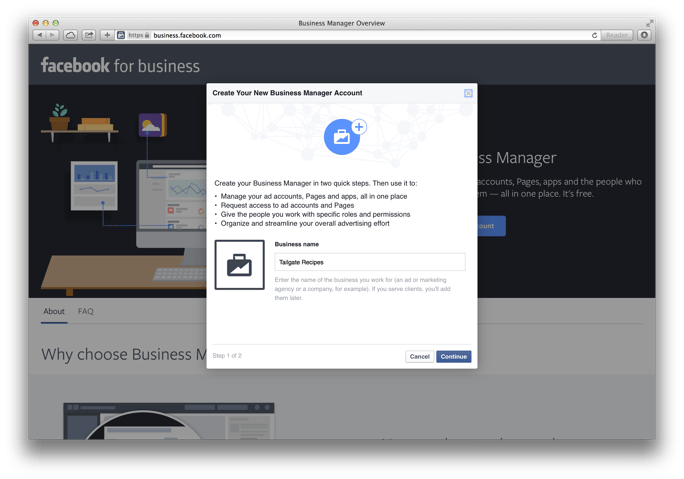
Step 3:
- Enter your first name, last name and business email. Click the blue button “Finish.”
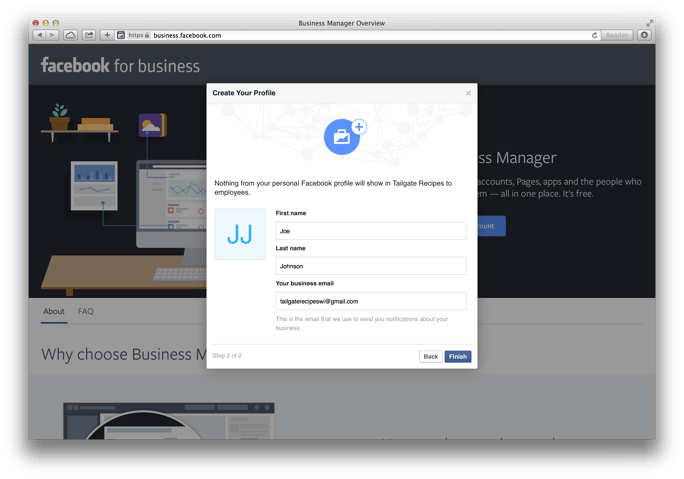
Step 4:
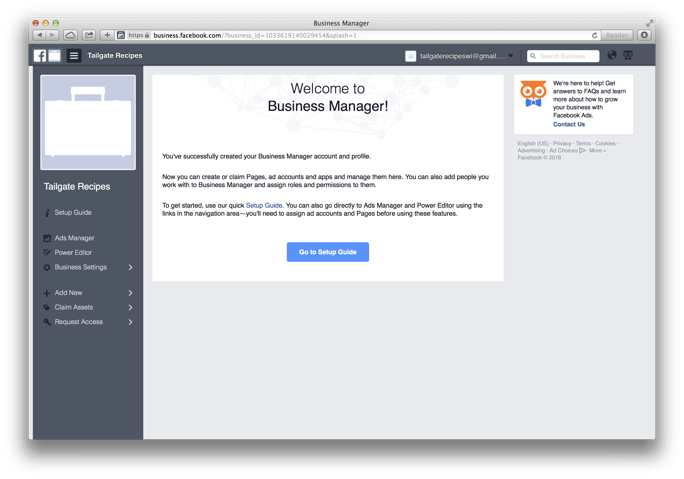
- You are now taken to the home screen of Facebook Business Manager and your account is officially set up. However, you are not quite done yet.
- There are a few more steps to follow below to make sure you connect your page, ad account and people. I recommend keeping this link from Facebook as reference.
Step 5:
- Click on “Claim Assets” in left navigation > Pages. Then, enter in the search box the Facebook Page you want included and click “Claim Page.”
- Note: you must be an admin of this page already.
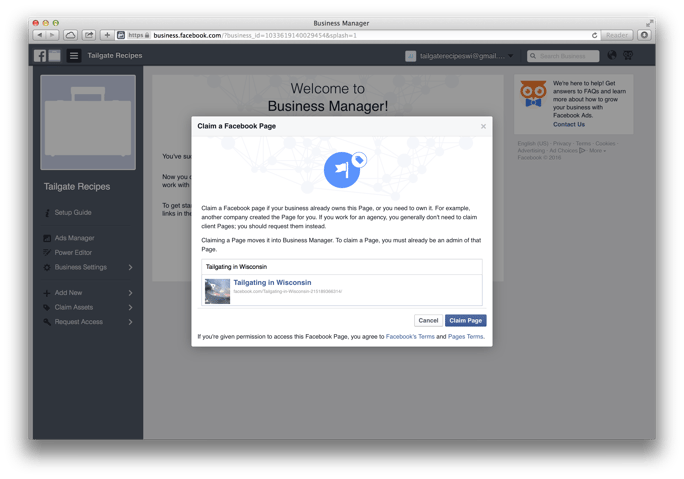
- After that you can click on the top left home button (3 line hamburger menu) to go back to the Facebook Business Manager home page.
Step 6:
- Click on “Add New” in left navigation > Ad Accounts
- Give your ad account name for internal use. Then click “Create Account.”
- The screen will then give you the option to add people to your Ad Account. You will want to select your name and give yourself the role of “Ad Account Admin.” Then hit “Save Changes.” The screen will then ask you to verify changes, and give you the option to set up your payment methods.
- You can either setup your payment methods with your own credit card or avoid that link and just hit the “OK” button. You can add payment method later or you can have your marketing agency partner set up the payment method with their own credit card if they do your media buys for you.
- After that step, you can click on the top left home button (3 line hamburger menu) to go back to the Facebook Business Manager home page. You will now see your Ad Account and Page Account listed.
Step 7:
- In the “Ad Account Admin” bucket you want to hover over the carrot icon on the top right and select the “Manage Ad Account” link.
Step 8:
- Click on the “assign partner” button in the top right of the page.
Step 9:
- Copy over the business ID from your marketing / advertising agency partner. NOTE: This is something only the marketing agency can provide to you directly.
- Click the “Next” button.
- You will then be able to assign roles to a partner. This will vary depending on the relationship you have with your agency. In our case, we request having “Ad Account Admin” selected for us.
- Click the “Next” button.
- You will then see a confirmation message that the partner was assigned to the Ad Account.
- Click the “Ok” button.
- Following that step, you can click on the top left home button (3 line hamburger menu) to go back to the Facebook Business Manager home page. You will now see your Ad Account and Page Account listed.
Step 10:
- If you want to add more people to the Facebook Business Manger, click on “Business Settings” in the left navigation > People.
- Click the blue button “Add New People” in top right of page
- Add the person’s email you want to add in the first field. Then choose what role you wan them to have. You have two choices: Admin or Employee.
- Click the blue button “Add People.”
- You will then want to select the Facebook Page (use checkbox) and then choose the role for this new person. You will have these choices: Admin, Editor, Moderator, Advertiser, Analyst.
- Click the blue button “Next.”
- You can then assign this same person the Facebook Ad Account. This will give them access to your Facebook Ads.
- Click the blue button “Next.”
- The final screen allows you to assign product catalogs. Our clients typically do not use this feature, but if you want to learn more about it I would recommend checking out this link.
- Click the gray button “Skip.” You will see a verification screen that the invitation was sent to this person.
- Click the blue button “Close”
Congratulations! You have now set up Facebook Business Manager for your business page and are on your way to being a Facebook ninja!


