Want to make video but all you have is Photoshop? No problem! Adobe Photoshop has video editing capabilities that you can use to make professional looking marketing videos.
Let’s walk through a few basics of making and editing video in Photoshop. This blog and video will give you a quick overview of:
- Photoshop video presets
- Adding video and photos in Photoshop
- Resizing images and video in Photoshop
- Moving and shortening video layers
- Adding shapes in Photoshop video
- Adding fade transition in video layers
- Adding text in Photoshop video
- Adding audio in Photoshop video
- Adding motion to an image in Photoshop video
- Rendering your Photoshop video
This video tutorial is intended for those with a basic understanding of Photoshop, if you are completely new to Photoshop check out these beginner Adobe tutorials!
Photoshop Video Tutorial: The Basics in 7 Minutes
How to Start Your Photoshop Video
- Select Create New
- Select Film & Video
- Select View All Presets+
- Choose the video size your project calls for
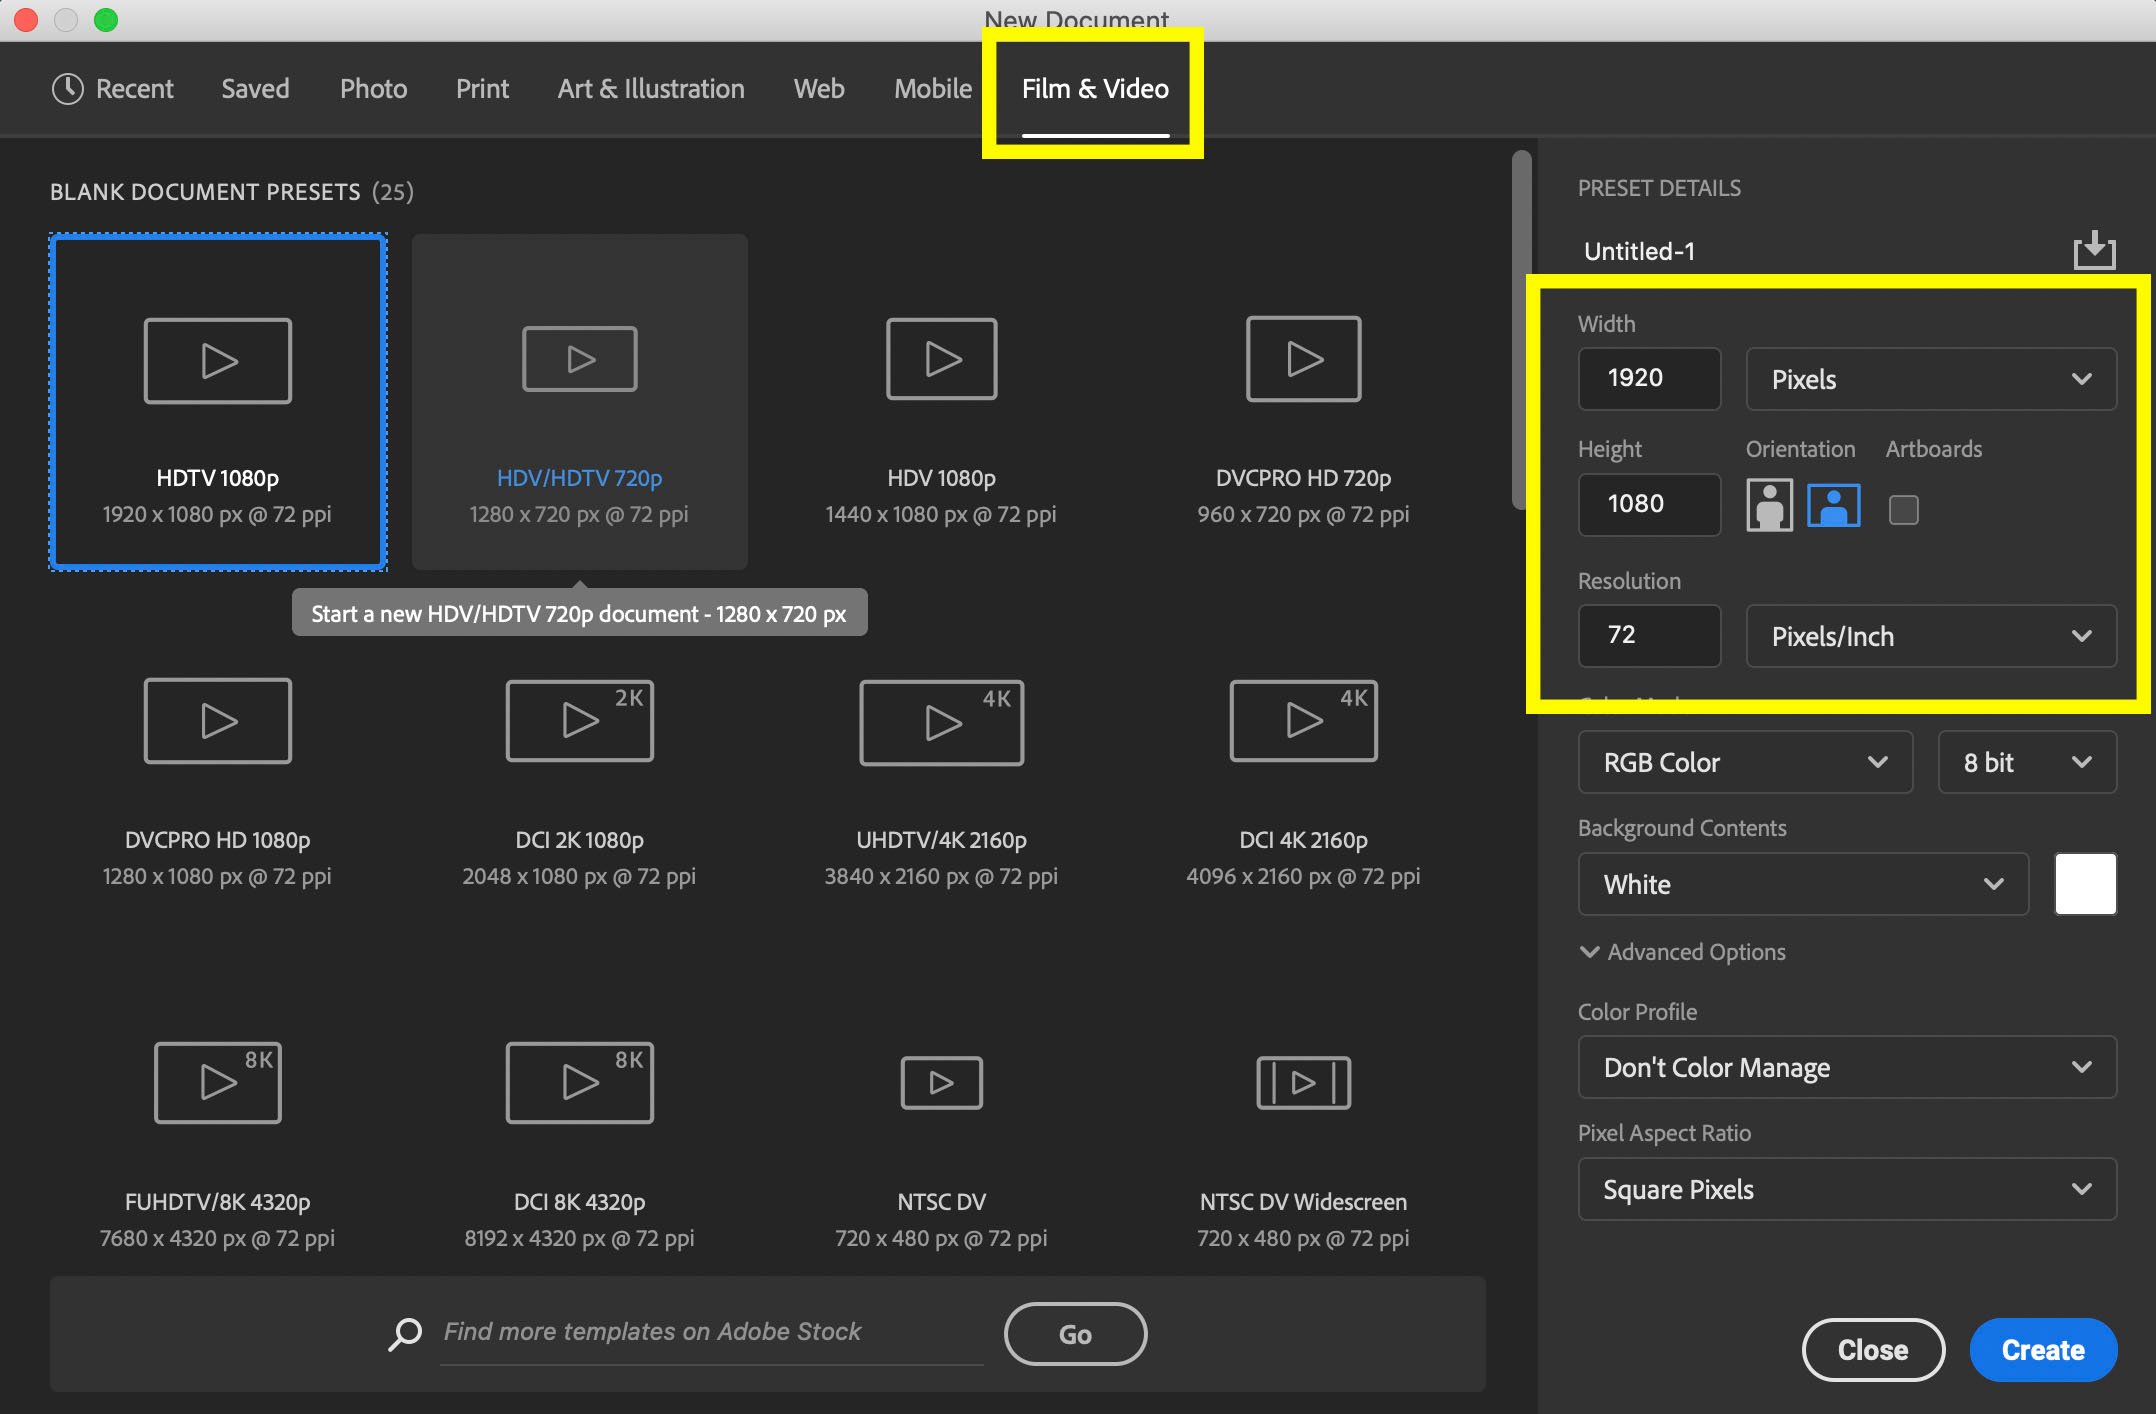
Not seeing the size you need? You can build a custom video size by typing in the pixel width and height on the right hand size then selecting create.
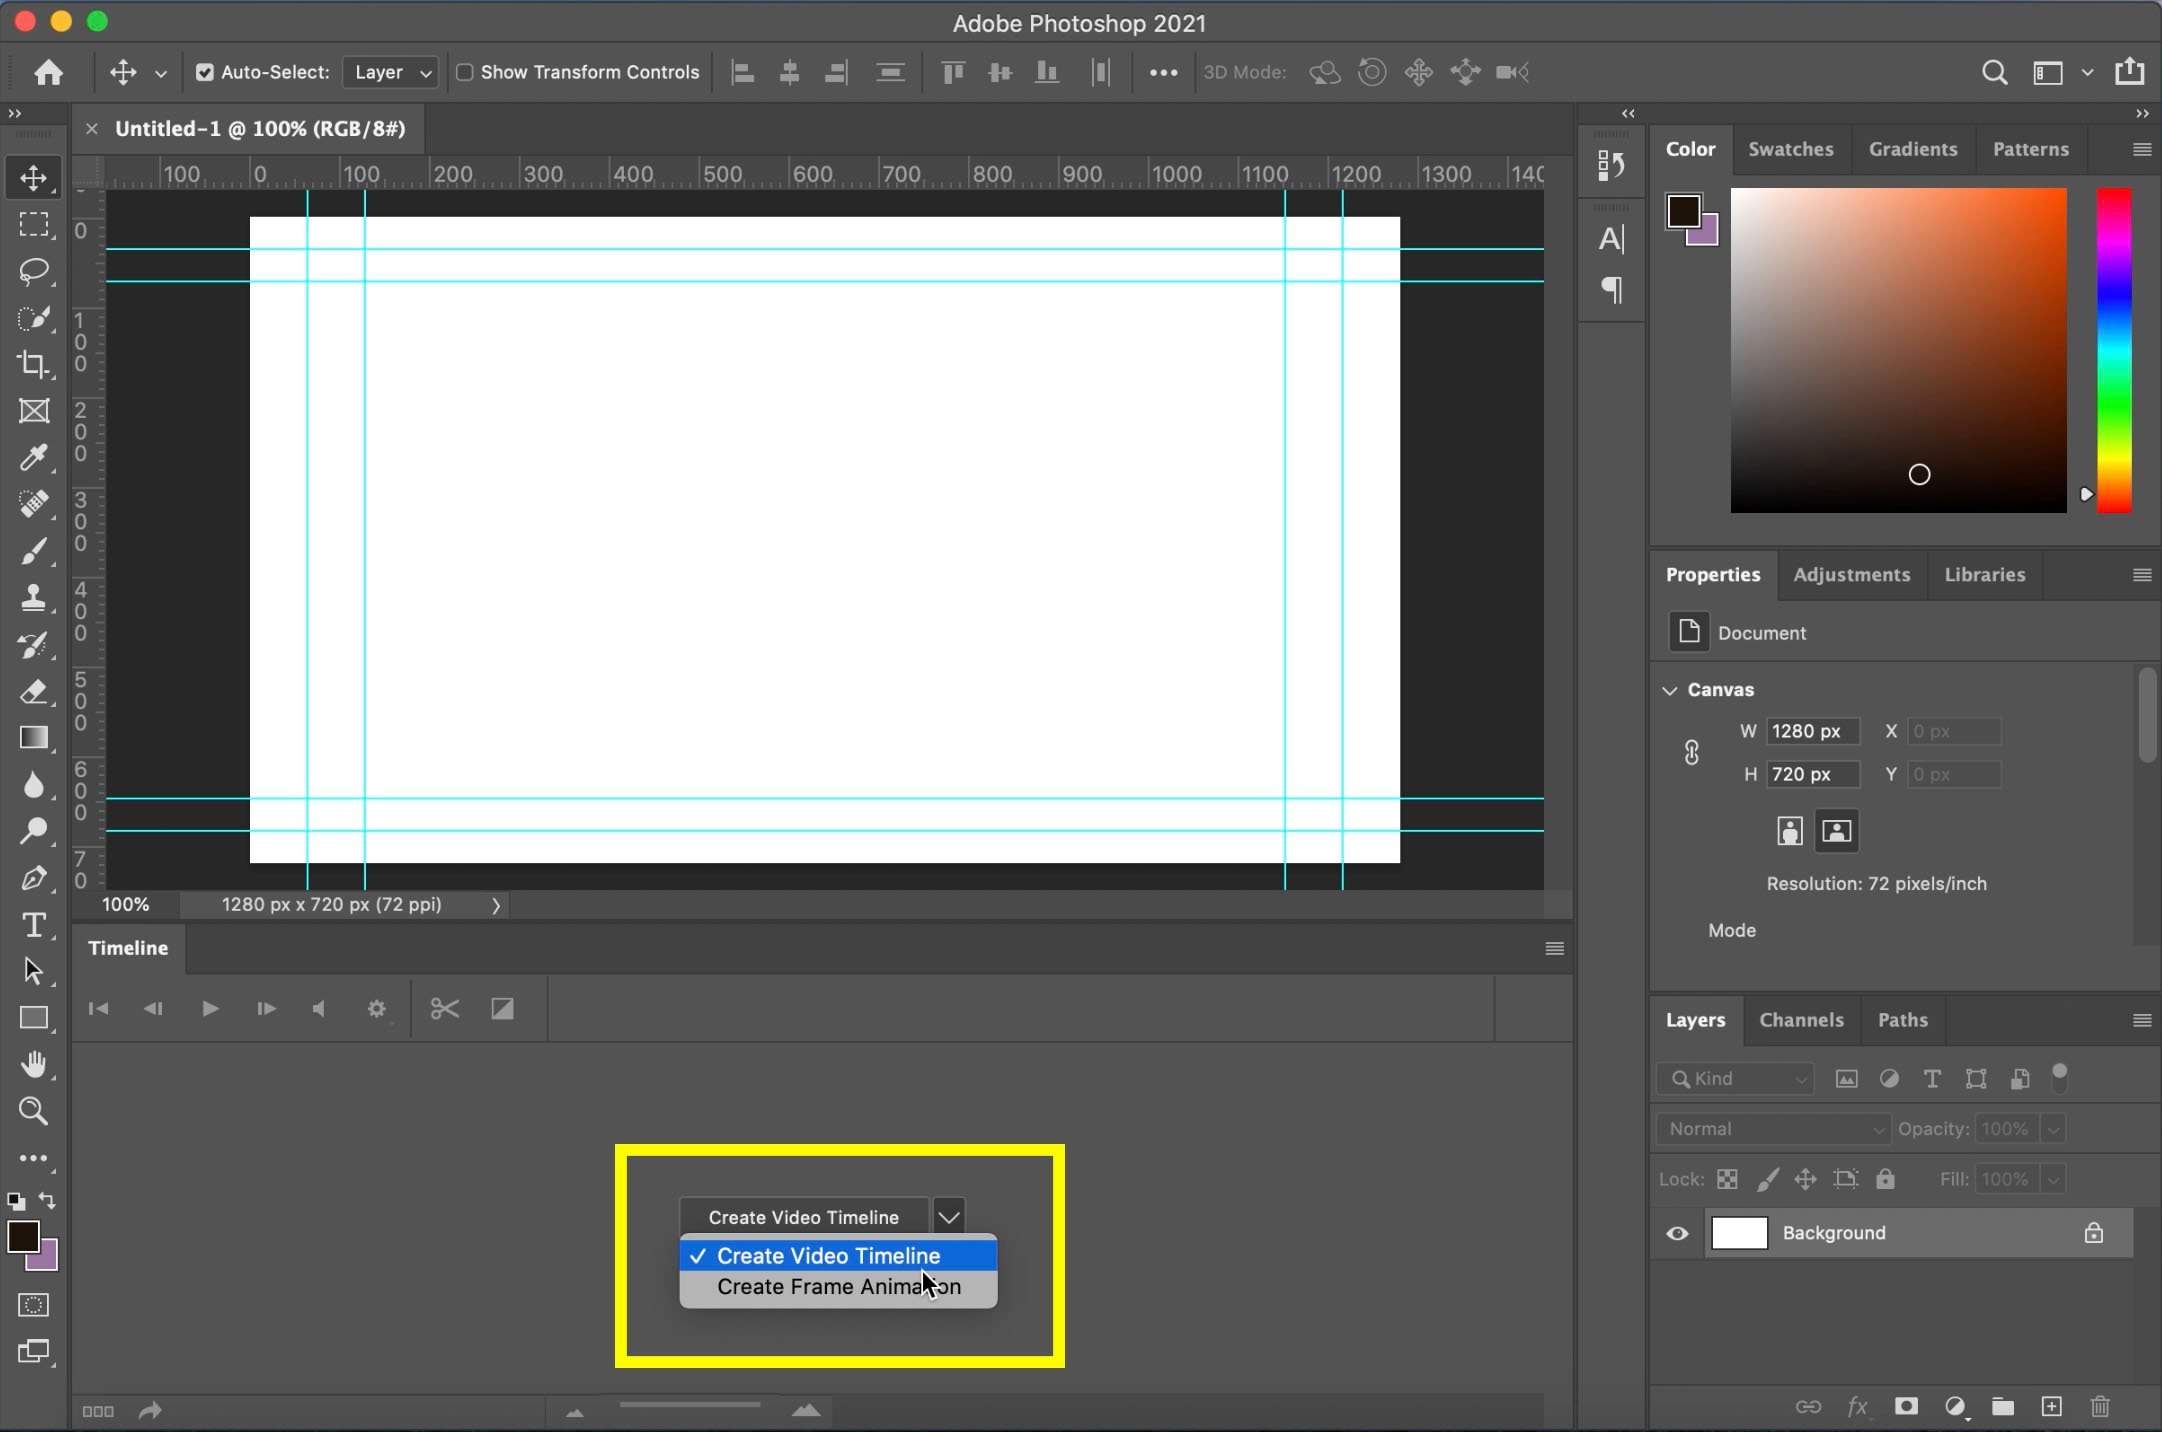
- After you create your doc, go to Timeline
- Select Create Video Timeline
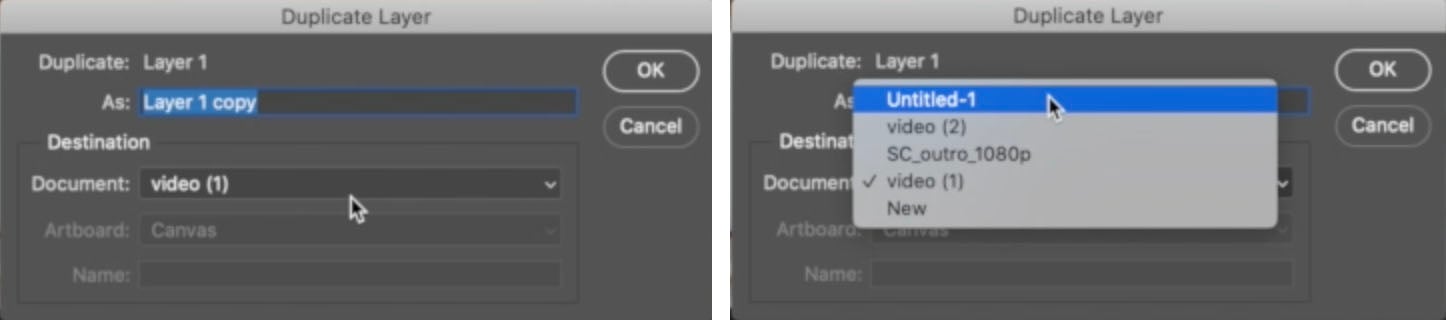
Adding Video and Photos in Photoshop
- Drag video or photo into Photoshop
- Right click on the layer once it’s in Photoshop and select Duplicate Layer
- A duplicate layer box will appear, in Destination select the document you’d like your video or photo to be in.
Resizing Video and Photos in Photoshop
Once your video or photo has been moved to your working video document, resize your media to fit (if needed). You can shrink or expand your media by hitting Command-T to select your media, then pulling on the image.
Moving and Shortening Video Layers
Moving layers in Photoshop video is very much the same as moving them in regular Photoshop documents. You can select your layer in either the Timeline or the Layers Panel and either drag them to be in the order you want them, or use Command-[ or Command-] to move them up or down.
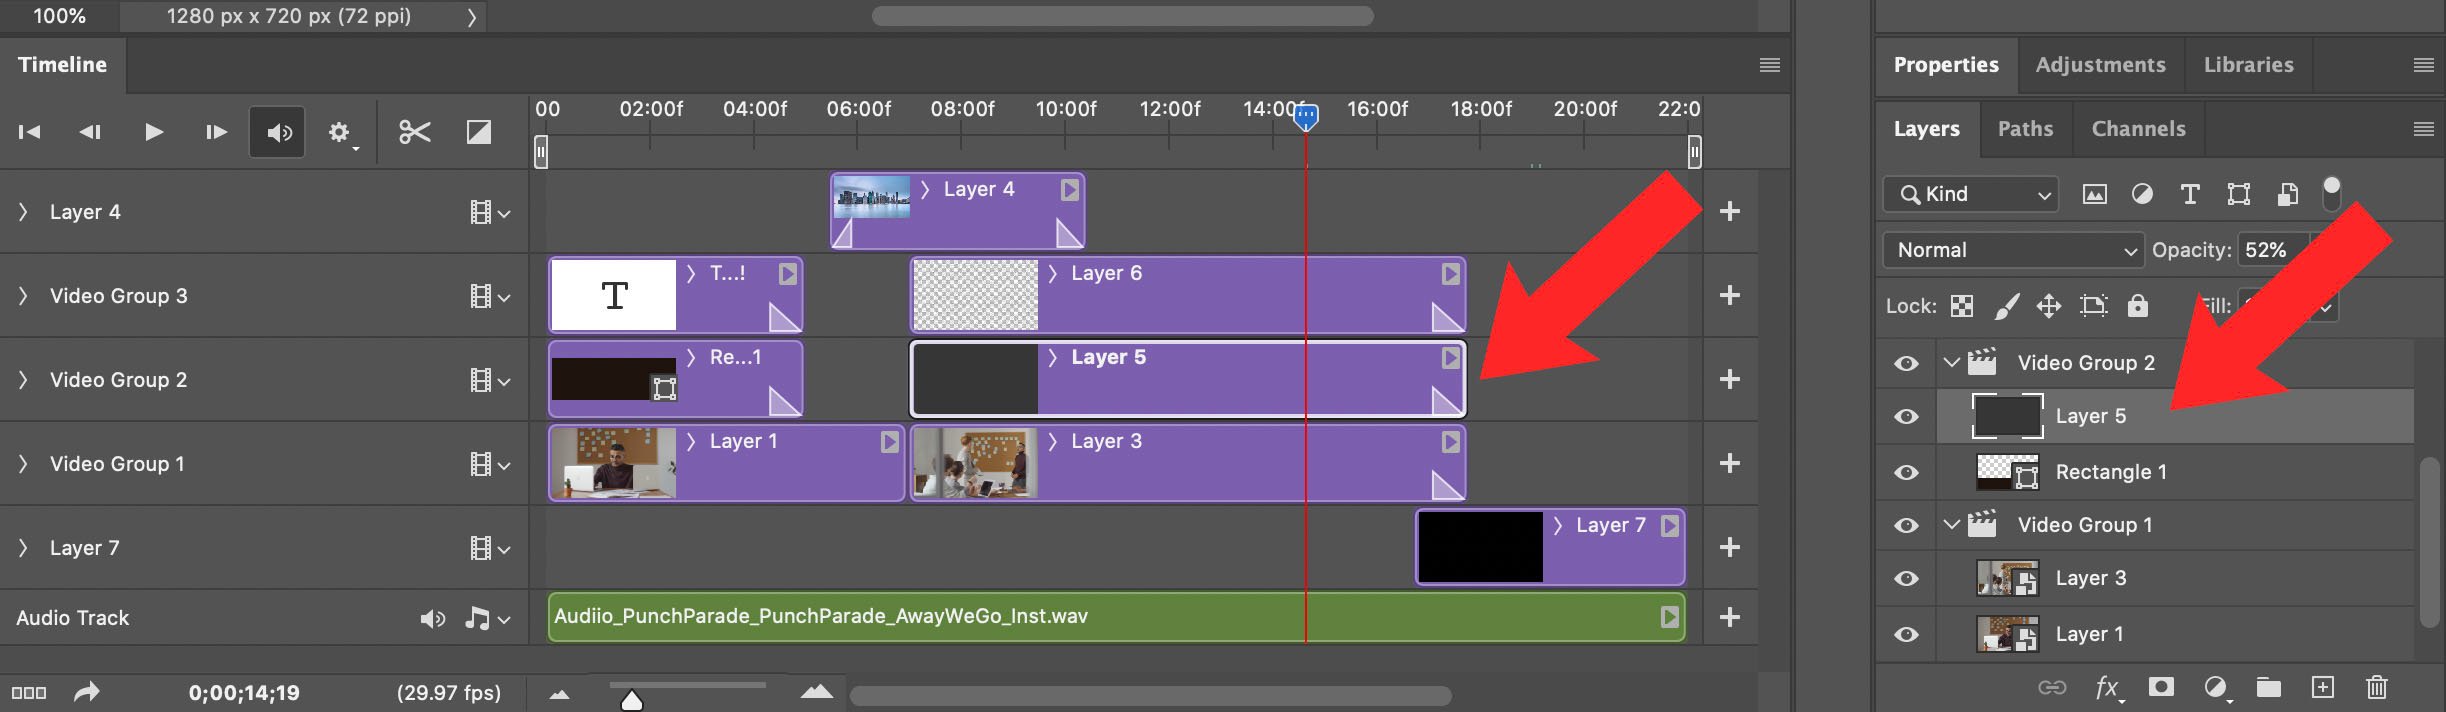
To shorten or extend the length of a layer, hover over the front or end of the layer rectangle on the timeline and drag it shorter or longer.
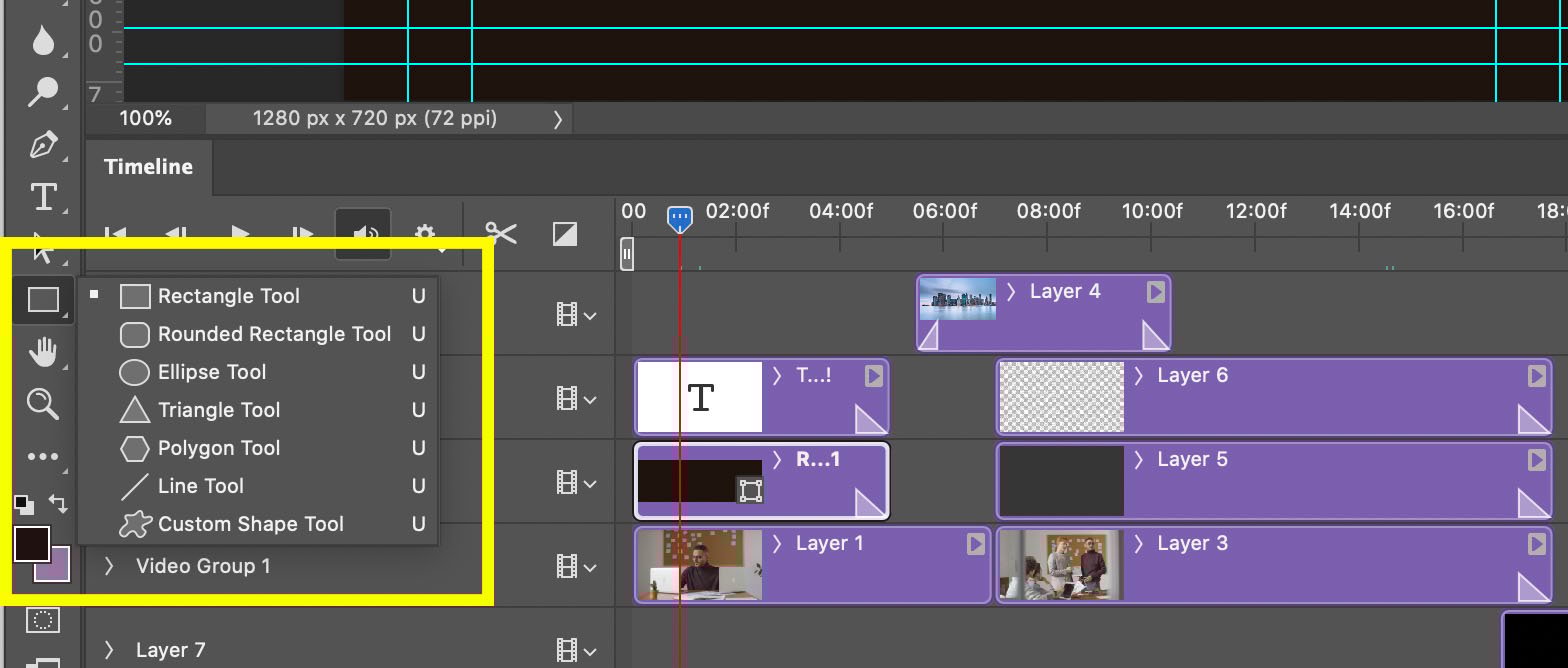
Adding Shapes in Photoshop Video
- Select your Shape Tool
- Draw your shape where you want it to be in the video
Your shape will appear on your video timeline like any other layer.
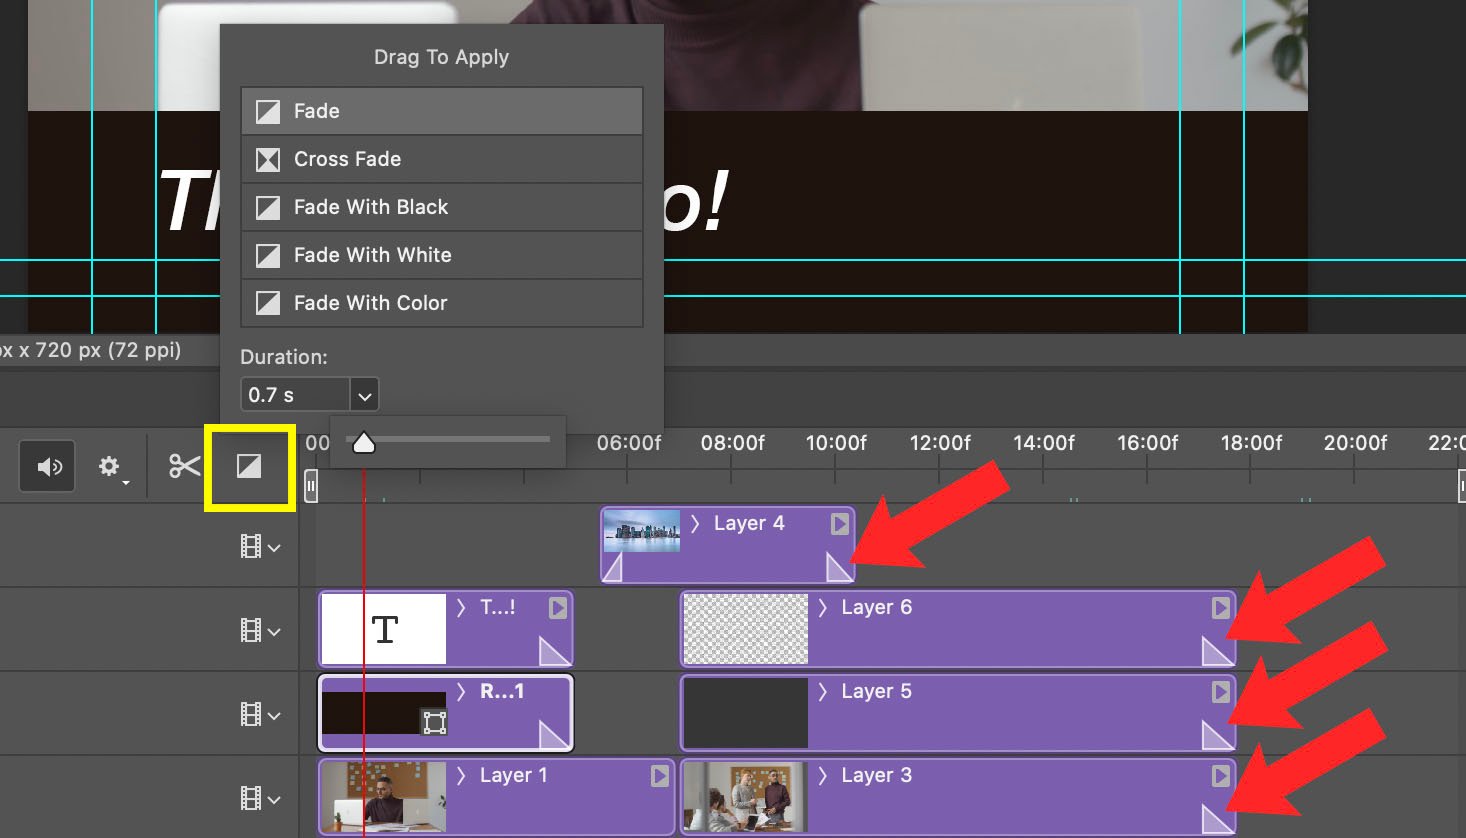
Adding Fade in Photoshop Video
- Select your Transition Tool
- Select the fade of your choice
- Use the Duration toggle to determine how long your fade will last
- Once you’ve made your selection, drag your fade to the beginning or end of your layer
Once you have applied fade to a layer it will show up on the layer as a little rectangle. You can drag this rectangle to make your fade longer or shorter.
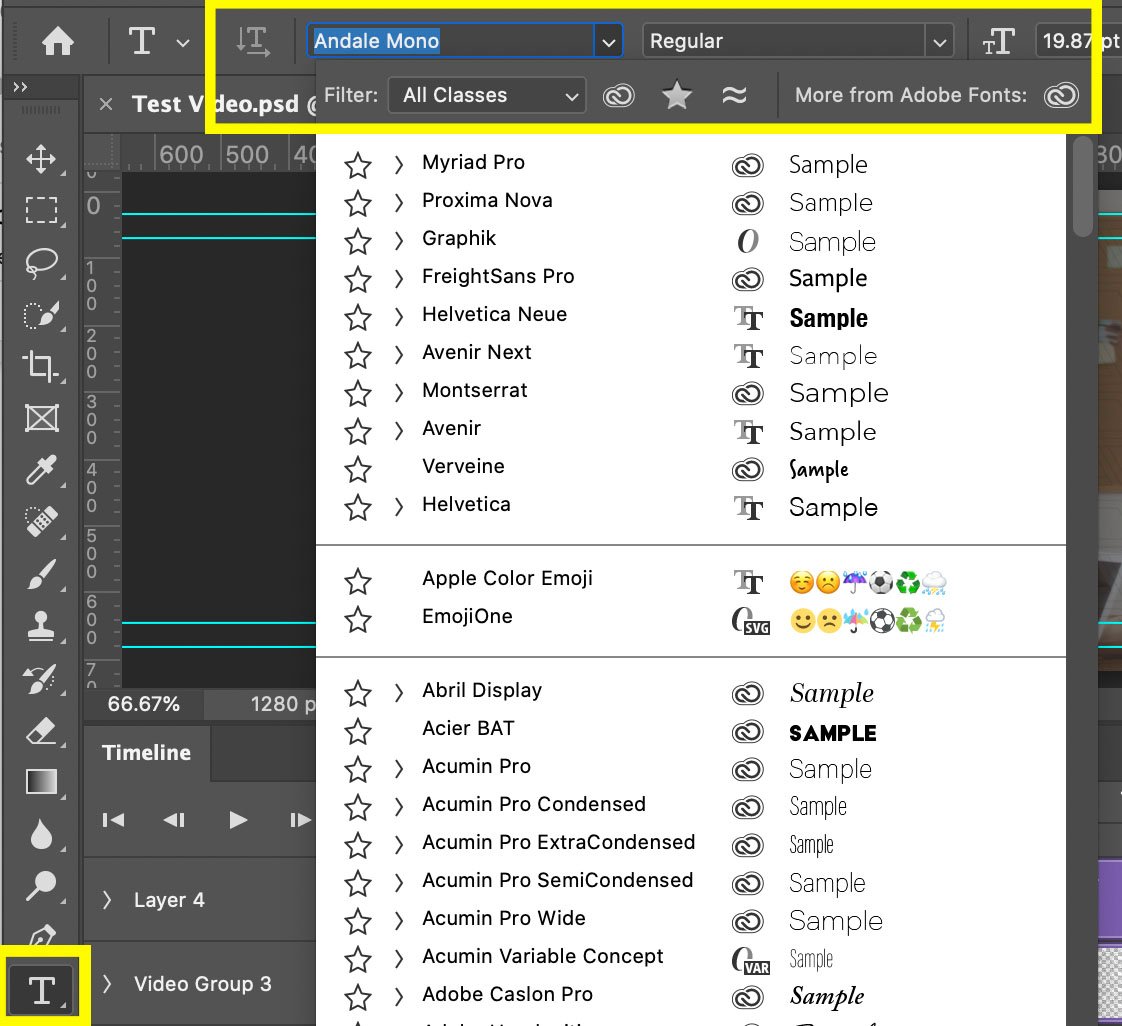
Adding Text in Photoshop Video
- Select your Type Tool
- Add in a your text and customize your fonts and sizes just like you would in a normal Photoshop document
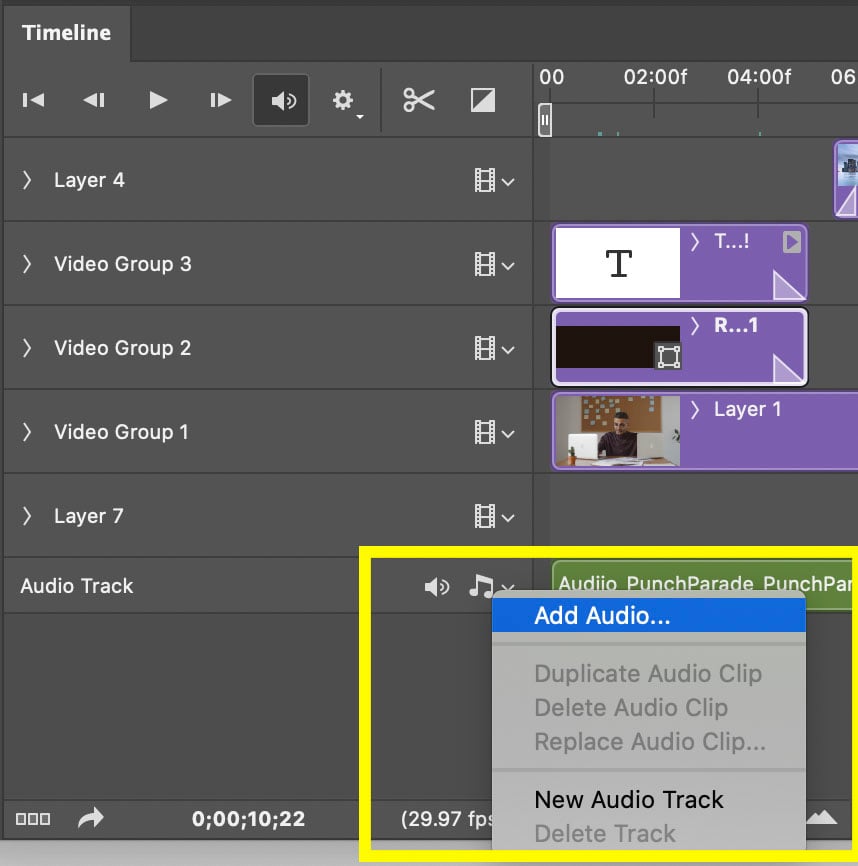
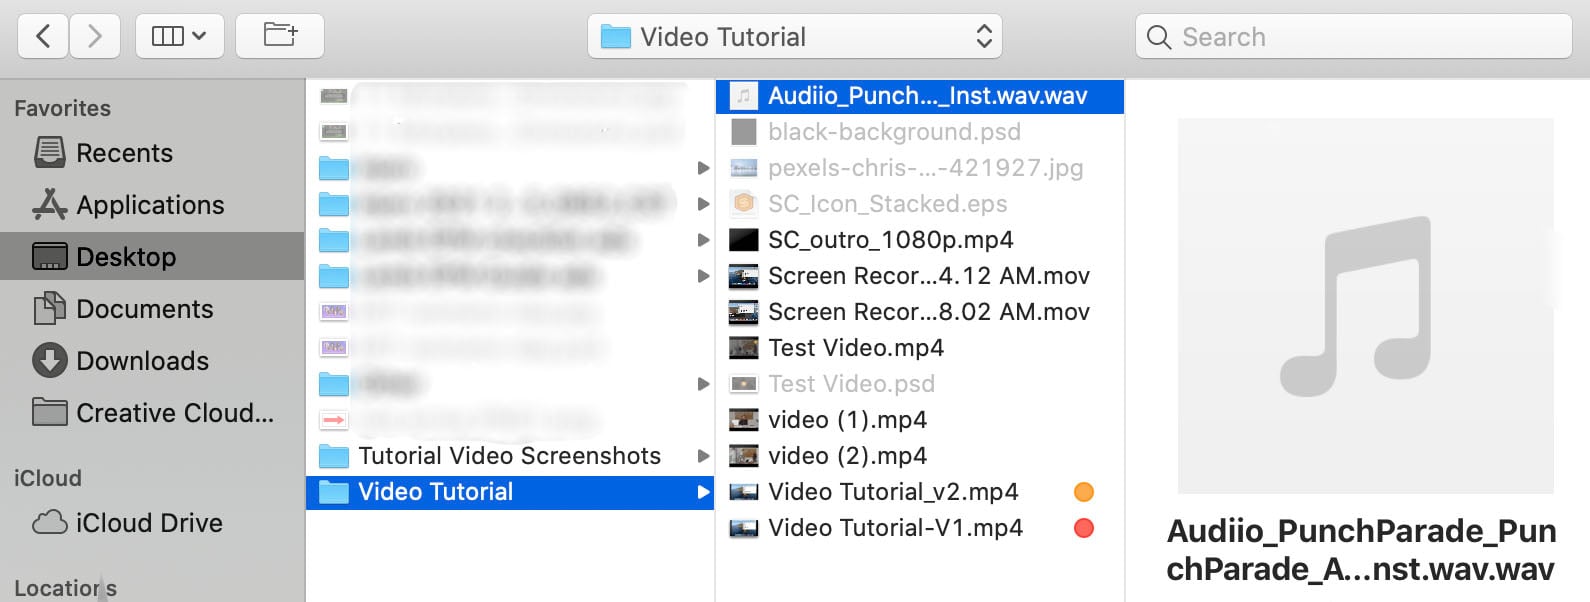
Adding Audio in Photoshop Video
- On your Audio Track Layer select Add Audio . . .
- This will take you to your files where you may select an mp3 or wav file to add to your video
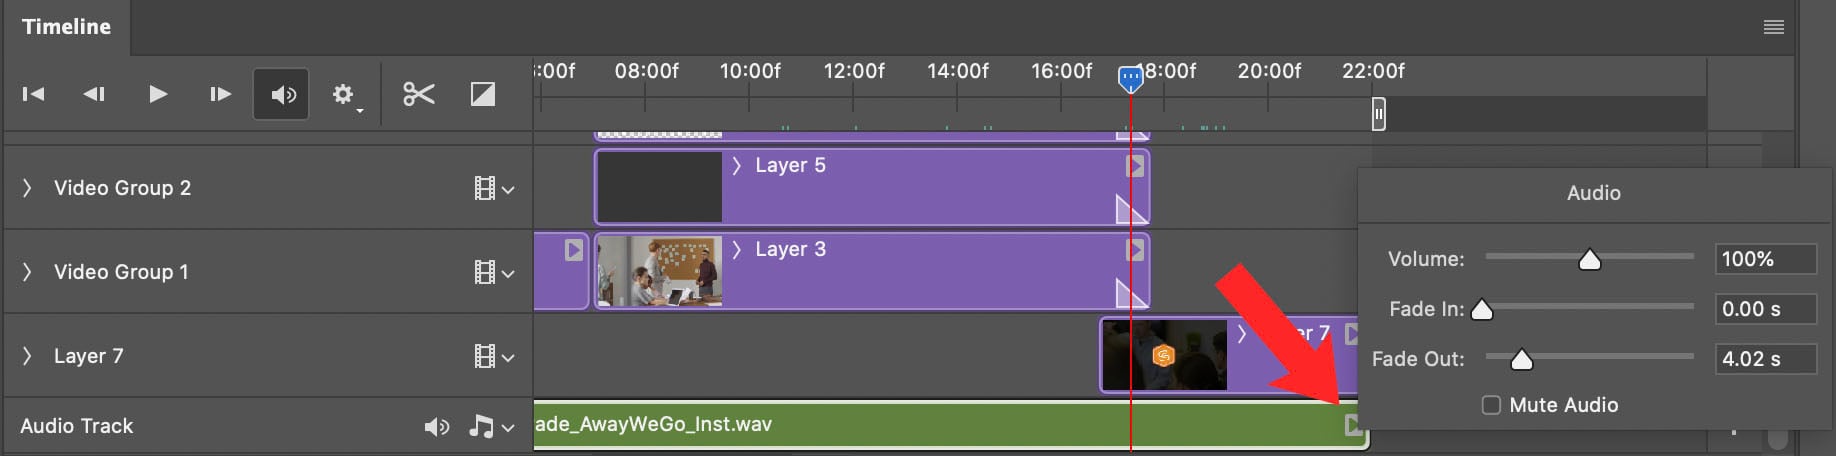
- Your audio will appear as another layer you can drag shorter or longer
- By clicking the little triangle in the right corner of the audio layer, you will bring up audio options that will allow you to change volume, fade in, fade out, or mute
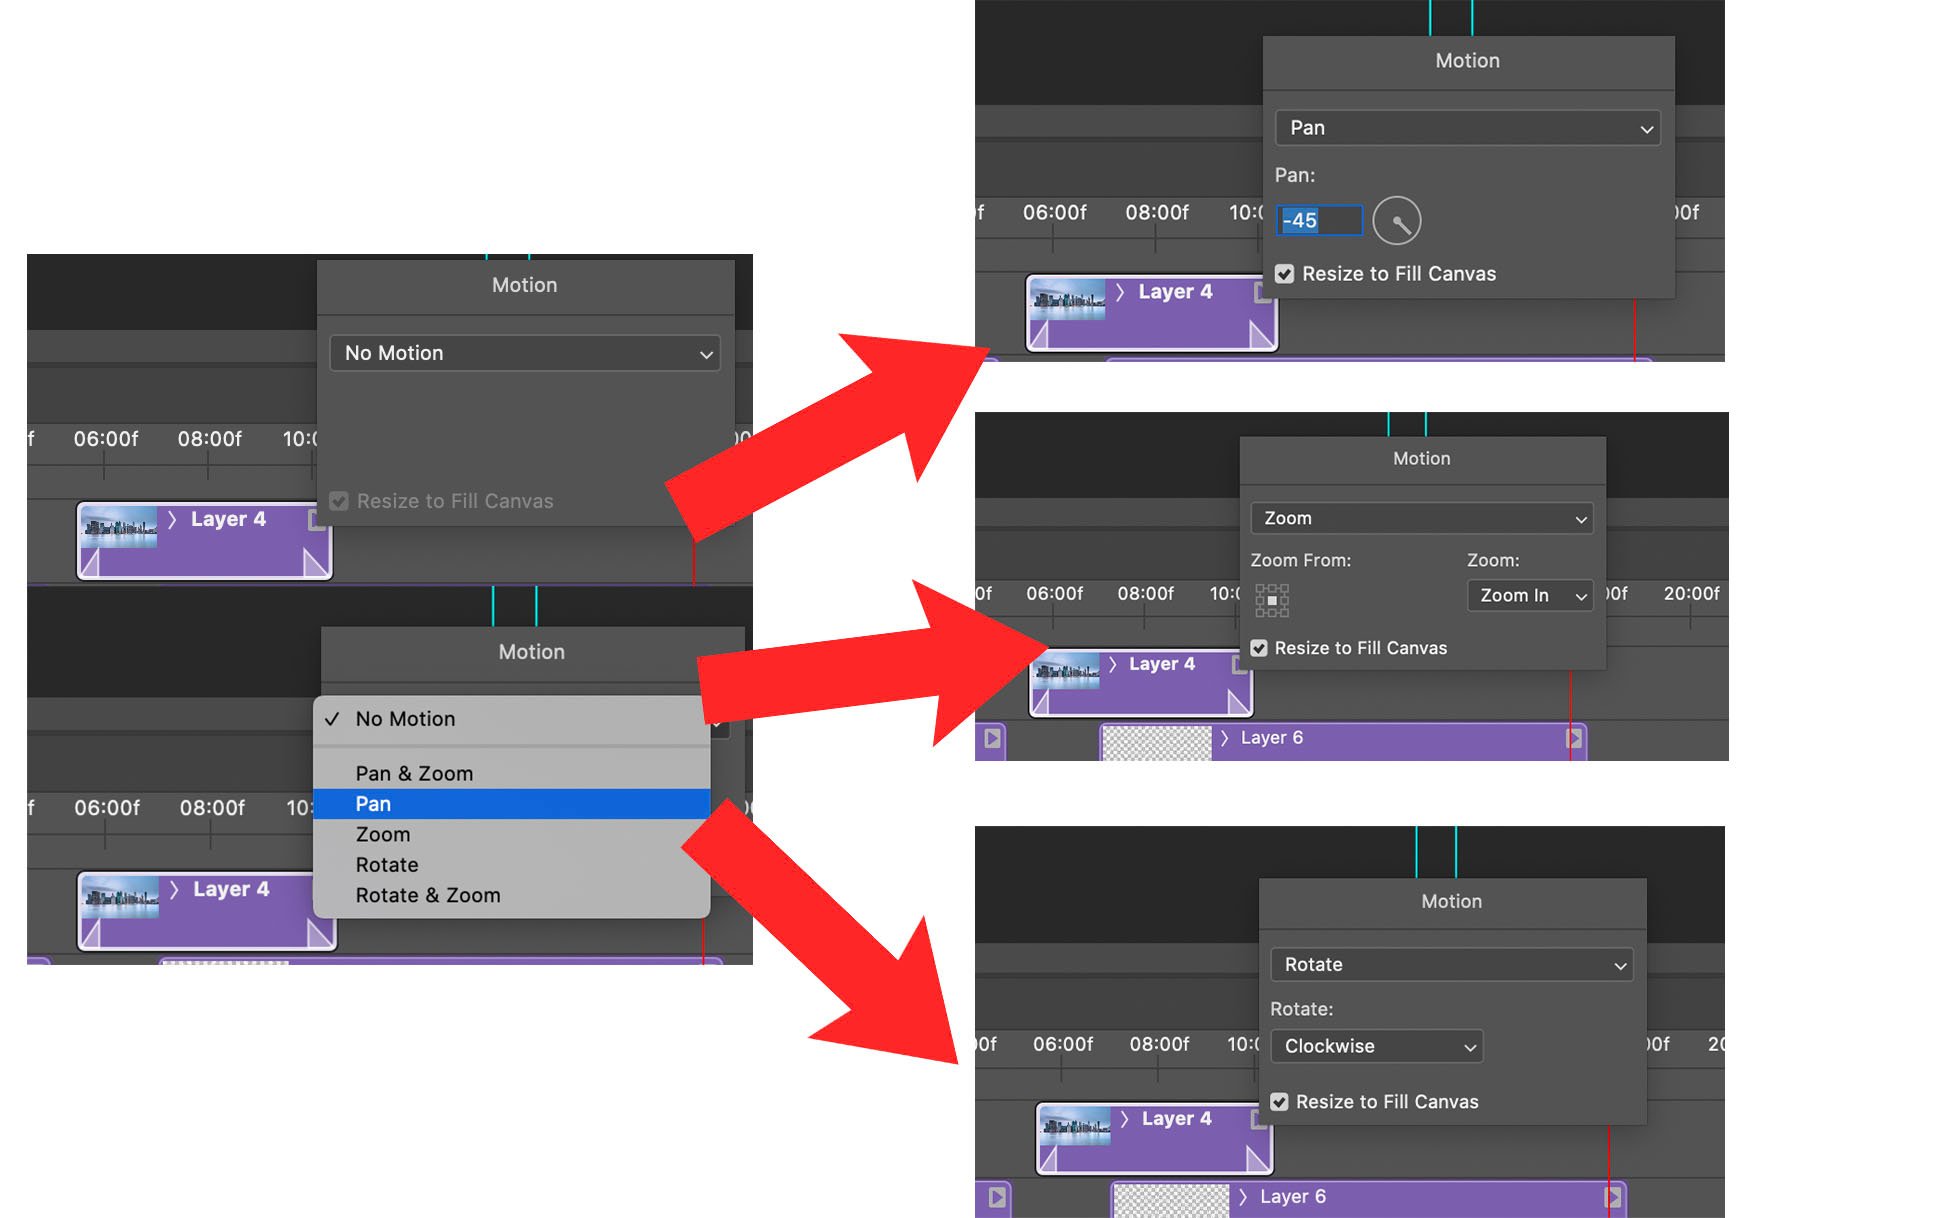
Adding Motion to An Image in Photoshop Video
- Click the little triangle in the right corner of your image layer to bring up the motion option
- You will be presented with various options
- Each option will present you with different dropdowns to achieve your desired effect
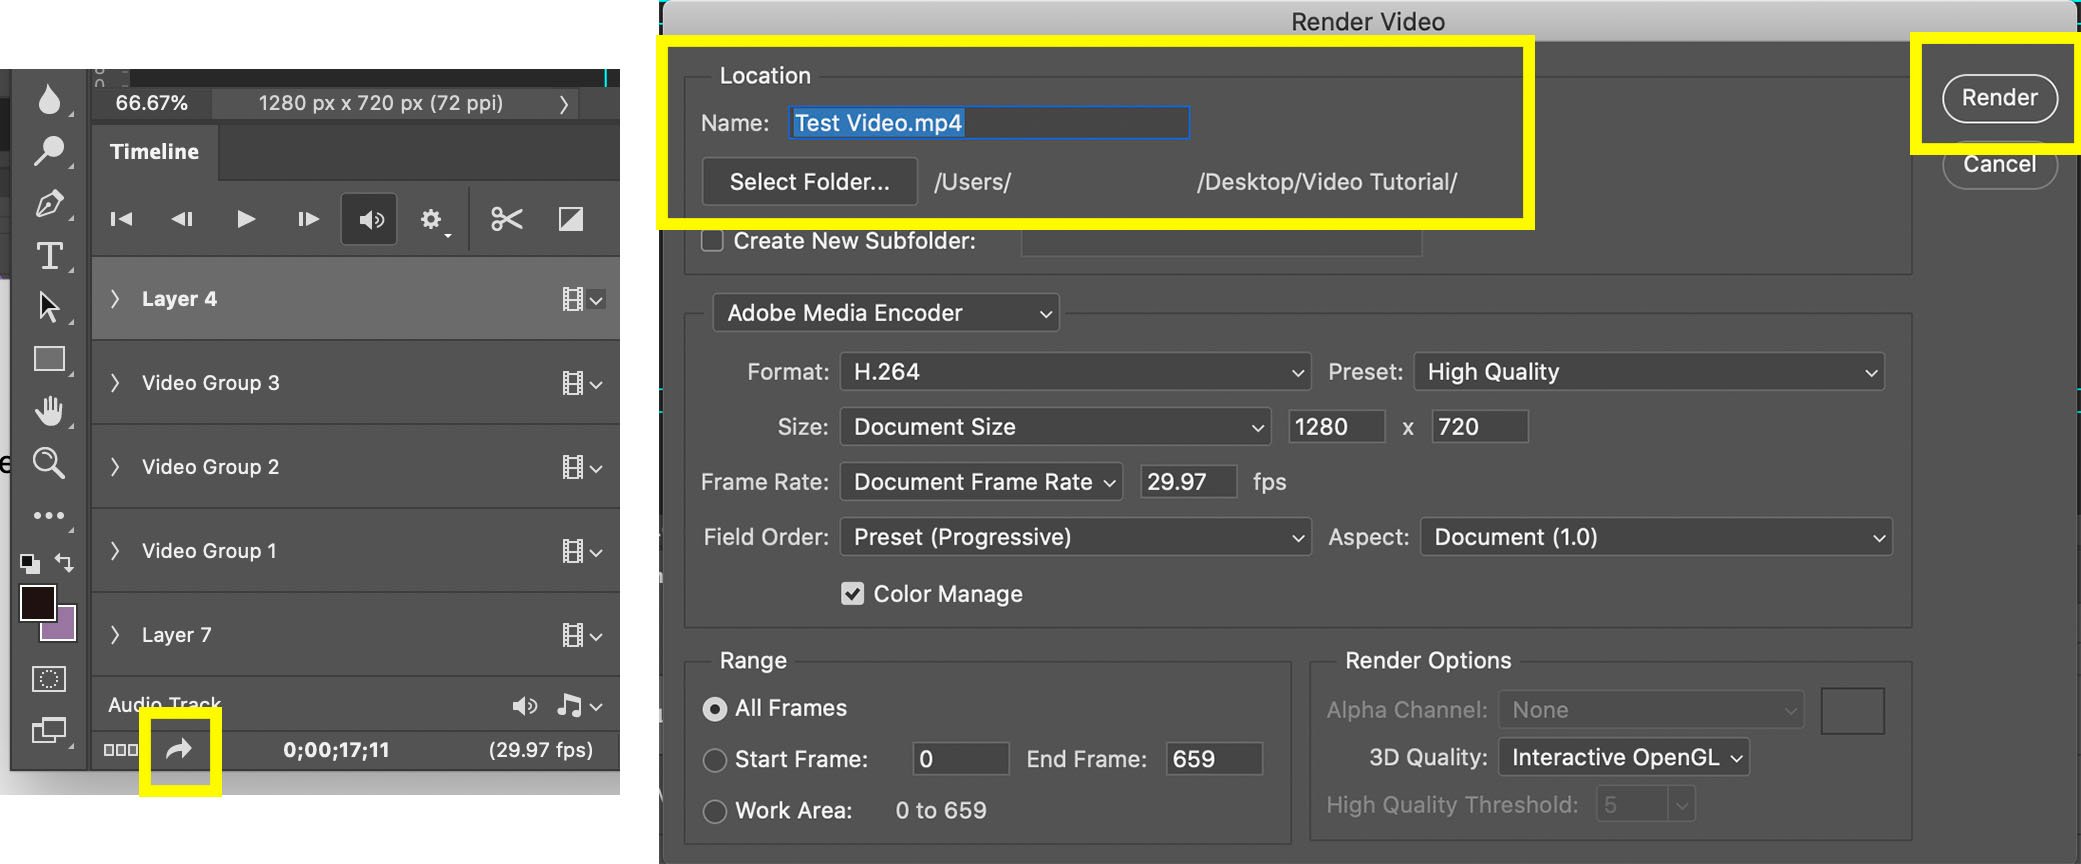
Rendering Your Photoshop Video
- Select the arrow on the bottom of your timeline to bring up render options
- Name your video (if you haven’t already)
- Select the folder you would like to save it in
- Select Render
Using Photoshop Beta's Generative Layer To Create Video Backgrounds
Many people have discovered the generative fill tool for images in Photoshop. What they may not realize is that this can work on video layers as well!
The video above walks through this process.
Note: This process works best with "stationary" backgrounds.
For best results, you'll want to use video with a stationary camera where the subject is not moving off to the sides. For these edits to look good, the background must be still.
Ideal videos for the generative fill background would be a person sitting and talking to the camera or a product being used while remaining in a fixed location. (Think microwave with a spinning tray.)
So how did you enjoy your crash course?
Many of you already familiar with Photoshop will probably pick up video editing in this software reasonably fast as most concepts from image editing transfer over very smoothly. In fact, pretty much anything you can normally do to an image layer, you can do just as easily with a video layer. Hue, saturation, masking, opacity, you name it! Once you master the basics of video editing in Photoshop, your possibilities are almost endless.If you’re looking for other resources on how to take your video marketing to the next level, check out some of our other video resources!
- Video Marketing for Manufacturers: Expert Tips and Tricks
- How to Create A World Class Business YouTube Channel
- How to Use Hubspot Video In Your Sales, Marketing and Service Strategy
- Video Marketing: 5 Tips to Impact Your Video Results
- How To Make A Screen Share Video Tutorial Using Adobe Premiere Rush (And Other Video Tips!)
- Podcast: You need a Video Marketing Mission Statement
- Podcast: The 2 Biggest Mistakes People Make When Pivoting to Video
Still have video editing questions, or want to talk strategy on how you can use video in your marketing flywheel? Reach out to us, we’re happy to help.